Hola ****** Bonjour ****** Shalom ****** Konichiwa ****** helo ****** allo! ****** barev ****** Sua s'dei ****** ni hao ****** jambo ****** hej ****** Bula uro ****** hyvää päivää ****** Guten tag ****** Γεια σου ****** Aloha ****** ha'u ****** Dia duit ****** Ciao ****** Yow Wah gwaan ****** chau ****** hei ****** talofa ****** hoezit ****** Kumusta ka ****** Li-ho ****** sawa dee-ka ****** sanibonani

Search Favorite Wedding Blogs

Loading

Search My Blog

Pin it!

28 February 2011

Weddzilla

Weddzilla Blog
After following one of my fellow Nebraska brides, she shared on her blog that she blogs for Weddzilla. I went to the site and took a look around... wow! There's a whole positive little community chock full of realistic and first-hand advice as well as typical wedding talk you'd want and expect. I was really taken with them so I applied--and now I blog there as well! I'll still continue posting different things from what is here, I'll just be blogging more often alltogether!

Please come vist me over there Tuesdays and Thursdays, and check out the other bloggers as well; they have a ton of wonderful ideas!

Vintage Lace Garter - DIY Tutorial #2

This weekend was DIY central! I got my last standing order of sock monkeys done (see the neon cuteness here at HiLLjO). Shawn took some winter bunny pictures of us. I made my garter. I also started our sock bunnies.

The garter is a luscious vintage lace creation that is a tad larger than your average leg adornment.

Here's how it was done.
I had 2 yards of vintage lace trim, a yard of swimsuit elastic, a needle, ivory & blue thread, scissors and some of my favorite Royal Blue American Ribbon in the petite picot style.
Stretch the elastic around your thigh until it's tight but comfortable. Cut this length and set it aside. Next measure your lace trim out to the circumference of your thigh and add an inch, then cut. I cut 4 lengths of lace total.
With right sides of two lengths of lace facing each other, line up lace how you'd like it to be aligned when finished. Thread your needle with ivory thread and sew the lengths together at the base of the trim.
Repeat for the last two lengths of lace.
Open up your trim you just sewed so you can see the right sides and flatten it with your fingers or an iron on LOW.
Tricky part ahead.
Get your elastic and make a lace-elastic-on-rye sandwich by layering as follows:
Opened lace length right side up
elastic
Opened lace length right side up
Lace your needle with ivory thread again and sew the first inch of all three layers together to anchor the elastic. Stretch the elastic to the end of the lace lengths and pin along the layers as you stretch. Continue sewing across the elastic-lace sandwich until the end, then knot and cut your thread.


Fold garter in half with right sides facing and sew the open edges together, whipstitching to hold any stringy ends in.
Knot several times and cut thread.


Easy part: Measure ribbon long enough to tie in a nice large bow around your thigh, cut length. Put your garter on and tie your ribbon around the center. Thread your needle with blue thread and secure the ribbon to the back of the garter where you just sewed the edges together. I also put two tack stitches on either side of the garter and also through the center of the bow to secure it all the way around the lace.
Easiest DIY yet. I'm starting to heart elastic, by the way.

27 February 2011

Cute Shot Glasses

We spent some time with some family this weekend and one of the trips we took was to my parents'. We haven't seen them for a couple weeks so she gave us our Valentine gift today.

SO CUTE! We collect shot glasses so this is highly appropriate.

We enjoy these.

25 February 2011

It's snowing AGAIN!

Thank goodness.
Why? Because we need a winter photo together with snow!

James L. Amos for Nat'l Geo. 1978, Dearborn MI
We've been meaning to take a winter photo of us together while we're engaged so that we can have a "seasonal-bunnies" collage matted in place of a guestbook at the wedding. Every time it's been snowing here the wind is too high to take a nice picture. Your hair is either all over in the wind or your nose gets red and drippy after 5 minutes outside. Purty.
I almost thought it wouldn't happen after all our snow melted last week so I am very happy for snow.  
Our matte's photo will be laid out in this way, but each photo will be of us from that time of year.
We haven't decided which color the matte should be. I don't think white will work. Maybe a light blue? Or yellow with Shawn's paper-tie-dye technique overdyed? We'll see... He will have to be dying a lot of stuff for the wedding.
The man is a master tie-dyer so naturally I wouldn't have anyone else dye my crinoline yellow for my dress, nor would I have anyone else dye the backdrop sheet for our photobooth. He just has such an eye for dispersal and color combinations. People ask him if he buys his shirts. NOPE! He dyes them himself with his hands.
He also takes rad photos!
You can see some of his stuff here and here. That's my leg by the way... lol.
He also colors with colored pencil so deep and so even that it looks like laser jet printing. So he will also be coloring in our DIY Marriage Certificate. He's a groom who is involved in the wedding because he wants to be, much to my delight!

23 February 2011

TERRA. COTTA. BUNNAY.

Does anyone remember my Unity Candle, Schmunity Schmandle post? I had found a bunny-shaped terra cotta pot in Hong Kong that I never dreamed I'd lay hands on for our Inity Ceremony (I know I said Inity). We went to the Planthouse and I saw the company's cat-shaped pot so I asked the owner if she knew about the bunnay one. She said, "Oh, yeah, my supplier has some right now!" So Shawn picked my jaw up for me and we wrote down our contact info for us. I didn't expect her to call the next business day! And I really didn't expect it to be under $20!!!

This baby has a date with a big blue bow around the neck and some acrylic paint on the eyeballs. Now I just need either an embroidered dirt rag or a couple mini shovels. SWOON!

I LOVE ETSY!

Of course, being an etsyer I am partial to all things handmade and vintage, as well as to things that enable me to make something by hand. I love finding little extra-special shops that take their craft to a new level or whose sellers bring their professionality along with their personal responsibility. I have found several well-known shops and products to share today, as well as some unfortunately(for us!)less-well-known goodies. These could all be for wedding, but I'm not going to limit your imaginations or theirs...
 
Whichgoose

This gal quit her dayjob and began making pretty full-time. She has headbands and accessories that would make you think a fairy may have touched them... they just look THAT good. She's not afraid to pile half a dozen butterflies on a comb or headband if that's what you're going for but she has lovely simple pieces for plainer dresses, too!

lilafrances

The notorious Mrs. Hanger and some less-known baby hangers and decorative ornaments are born of the hands of this shop owner. Her wedding dress hangers have been seen in a plethera of wedding blogs and thus the madness of acquiring one begins. These are limited in availability and stock, and require an 8-10 week waiting period so if you dream of "Mrs. Whatsherface" go early!


AnimalsInYarn
This lady is just, and I don't use this word, amazeballs at crochet. I don't know what else I could say about her except go see!!!


jewelrybyjohan
A shop with Hawaiian Island flava'. All rings are handmade from things like wood, meteorite and titanium. All kinds of styles from basic to super blingy.


If any of your favorites are missing, comment or email me and I'll add them to an etsy's best post in the future.

21 February 2011

Favorite Things: Jennifer Behr

Now that I've had a week to soak in all the Jennifer Behr pretty, I have become objective enough to pick favorites! I also have BHLDN hangover, so I got super excited at the sight of this belt by Behr in the BHLDN collection.

I know, it's not a headband!!!
So here's my favorites and a splash of the palette


What do you think of the colors she's using? What's your favorite?

18 February 2011

OUR FAVORS CAME IN!!!

Shawn's momma Donna had found some sunflower seed packets that were personalizable a couple weeks after he and I got engaged and we all decided they were awesome for our favors. That was decided so long ago that we had almost all but forgotten about them. I even put up the sample picture with the names "Morgan & Matthew" on this post. I was so used to seeing that picture that when Donna sent me this

I got a little teared up, y'all. It's REALLY happening! We're getting married!
I'm a little verklempt.

Today I wanted to mention something that we're doing that is "different." I want both of my parents to walk me down the aisle. I'm an only child and both of my parents are equally close to me. They've walked me through life and they're both gonna walk me to my husband. It's the only way I feel about it.
Photo by JR Compton
That lady had her mommy and daddy walk her. .
Daddy is special, though... I've always been a Daddy's girl. The truth is though, he's a girl's Daddy, too. He may have taught me well more than what's necessary in the garage, but that man can unwrap the packaging on a Barbie like Superman.

We're gonna hafta dance at the reception together and then call Mom out to finish dancing with us all together. That sounds like a plan.

17 February 2011

Crochet Ring Pillow - DIY Tutorial #1


I decided to make my ring pillow after seeing a combination of the knit ones from Martha Stewart and of this fabric one I found here at Cre8tive Designs.
I knew I would crochet it because that's my go-to medium. If you don't crochet, enjoy the pictures! If you do crochet, enjoy it all!!! First, I got 1 ball each of Red Heart's worsted yarn in coffee, medium thyme, gold and cornmeal. I also used about a softball size pouf of sock monkey guts(poly fill). For the ties I used a spool of American Ribbon's petite satin picot-edge ribbon in Royal. A yarn needle, scissors and a crochet hook is also used in the project.

Pattern
Gauge is not crucial to this project however, my gauge was 3 sc per inch.

Brown Center
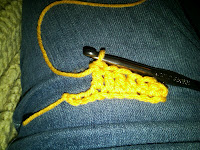
Round 1: With a J hook and yarn in coffee, ch 3. Join ch to form a loop. 12 sc inside loop, join to form a round.
Round 2: 2 sc between each sc around, crocheting in sp between sc's. Join round.
Round 3: *sc between first 3 sc, 2 sc in next sp* around, join.
Round 4: *sc between first 5 sc, 2 sc in next sp* around, join.
Round 5-?: Continue in pattern until pillow measures about 4 1/2 to 5" from center to outside. After rounds are complete, tie off and weave in any of your loose yarn ends.

Green Backing
With your J hook and medium thyme yarn, make another circle according to the pattern for the brown center piece. Instead of tying off, leave a 20" tail and weave in the exposed end from where you started.


 Petals
I made 3 rows of petals to make it look nice and full. The way these are made is in a long string, so you have to make each petal string the length of your brown and green pieces' circumferences. To do this, measure across the circle for the diameter and multiply by pi or 3.14

Petal 1: With J hook and gold, ch 10, sc in 2nd ch from hook and in next 2 ch. dc in next four ch. This will leave you with 2 unworked ch spaces. You can choose to work another dc or to leave two spaces. This will be the gap between your petals.

Petal 2: ch 8, sc in 2nd ch from hook and in next ch. dc in next 3 ch working in a 2" scrap of cornmeal by combining yarn threads. Leave remaining two ch unworked.

Alternate hooking a petal 1 and then a petal 2 around until your petal string is as long as you need it. Add in a scrap of cornmeal here and there in order to create a natural color variance*see below.


Leaf Handle
Round 1: Using the gauge emerging in your project, grab your J hook and medium thyme and ch as many ch as worked stitches it would take to measure across the diameter of your green piece.
Round 2: sc in 2nd ch from hook. sc in next ch. dc in next 3 to 4 ch, then trc in next ch. work a hdc in next ch and ch 1. Leave 2 to 3 unworked chains to be the leaf's "stem."


Round 3: working UNDER the stem chs, mirror the stitches you just completed on one side of your leaf up into the st on the other side of your foundation ch. slip st and tie off, leaving a 4" tail.

Now comes the fun part!
You're going to put it together by stacking all the pieces except the leaf like a crochet oreo cookie. Face all your individual pieces so that you know where your wrong side is and where your right is.


Layer as follows:
Green backing right side up
Petal strings 1, 2 and 3 (making sure bottom of petals touch outside of green circle and the petals are pulled towards the center)*see photo
Brown Center right side down

Now the tricky part!
Thread your yarn needle with the green tail you left on the green backing.
Read: When you are combining all your layers in these next steps, make sure you are pushing your needle through each layer's corresponding outside stitch so that you don't have gaps or fall out-y pieces.


Pull the threaded needle through each layer of crochet's outside edge making sure you go through each piece every stitch. A whipstitch is fine enough.


When you have sewn all around except for leaving a 1 1/2" gap or so, knot your yarn and leave the tail. Turn your pillow inside-right to inspect your work and check for gaps/holes.


Finishing
Stuff your pillow and sew the pillow closed using the remaining yarn tail and yarn needle.
Sew your leaf handle to the green backing at the end of the stem and at the tip of the leaf. Slip your hand into the handle and hang the pillow to your side. Mark the area that will most likely be seen as the top.
With your crochet hook horizontal to the floor, pass it under the center of the top from right to left. Fold two 18" lengths of your ribbon in half making sure all the ends are even. Place the midde of the ribbons where they fold onto your hook and pull through the space your hook was woven into. Remove your hook and continue to pull one end of the ribbons through where the hook just was. Pull the ends together to make sure they are even on both sides and tie a double-knotted bow.
Hide all loose yarn ends.

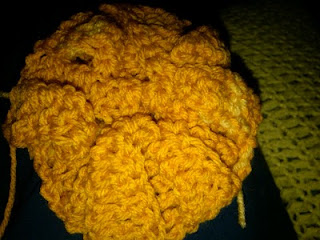
Bad picture. Fabulous pillow.

16 February 2011

Wedding Planning / Life Lessons

Our wedding is teaching me a lot. Wedding Magazines won't tell you that you should learn at least one thing about life while you're planning. I say at least one to account for short-engagement brides!
What I've learned so far:
1. Follow your heart. This is your wedding and you won't have a chance to pull a re-do. On ANYTHING.
2. Be receptive to help that is offered and accept it. I'm a DIAY(Do it all yourself) queen and like to be self-sufficient. There is no way you can be self-sufficient planning a wedding; you will need help and the sooner you realize that if you're like me, the better a time you'll have planning.
And the latest...
3. Sometimes the problem is the solution! If you have an idea for something and it's not working out, it may not be meant-to-be. My headpiece has been driving me up the wall for going on 3 weeks now. I have been patient, I have bought more materials and I have tried several versions. I accept that it's not working.

So what's the solution hidden in this problem?
Since I've met Shawn, on my BEST days when I'm really happy and it's Spring or Summer, I wear a sunflower in my hair. I've had everyone from my mother to our friend Chuck, the Juggalo, say it's awesome. So on our Wedding Day, an early summer day that will be the happiest of our lives together so far, why would I wear anything different? It's my HiLLjO-flavored personal celebration of the best day of my life until Shawn and I make children.


Lastnight I did a makeup trial and came to this realization after trying my makeup on with my flower. What do you think? More eyes, less eyes, more color...?

Did you know? Hawaiian tradition states that a single woman wears flowers in her hair on her right side, while a woman who is taken wears them on the left! Who knew?!

The Knot


I just saw a darling bride at groom at The Knot. I love their sunflowery theme and their story. Take a browse through if you like!

15 February 2011

14 February 2011

Valentine Weekend

This weekend was a BLAST!

  • It started an hour early. Shawn surprised me by getting home from work at 5!
  • We took a mini-break from wedding planning after Saturday was over
  • Sunday Brunch was nuts, courtesy moi.
  • Downtown Omaha was the only date plan we outlined for our amazing Sunday!
  • Surprise Presents are yet to be exchanged.
Saturday we went to my mom's house and officially asked all our girls from Nebraska if they would like to be in our wedding. We also planned a shopping trip for the dresses next month, wrote down flip flop sizes and took stock of headpiece style preference (I'm going to make all the little girls a hair clippie or headband to wear at the wedding).
I tried to finish my headpiece, everyone...
Not so good. I think the headband part has got to go buh-bye. It dents my bangs and the right side of my hair and looks perpetually unfinished. I also tried putting the flower cluster on a french barrette but it's much too heavy. So I set it down again, along with all things wedding after 2 PM.

The headpiece design must be something that's just going to take a little longer. I've also considered if nothing works, just wearing my hair down with a flower behind my ear. Whatever!!!

Sunday. Brunch. Was. So. Good.

I made heart-shaped cinnamarolls for everyone, omlettes requested by the guys, and I had this baby:

Frying cheese cubes, walnuts and sugar-sprinkled red raspberries.
I've heard of people getting the urge to finish a package of oreos before and I don't share that urge, but this dish gave me the same kind of urge to eatitallNOW! I think it was the cheese...

Sunday we went downtown Omaha and didn't really know what we were going to do, we just knew food would be a part of the plans. We were thinking sushi and then I saw Spaghetti Works.
And I also thought "wine."
Neither of us wanted to ruin the night for the other so we proceeded to volley "I'll go wherever you want, bunny," back and forth as sickiningly sweet as a game of "No, you hang up first!"

Spaghetti Works won because we got sushi last Valentine's Day. Dinner and wine was great. When we went back outside it had gotten a bit colder so we looked for anything open to get a shield from the wind.
We went to the Tobacconist to get a couple stogies and ended up talking with a drifter for an hour and then headed home.

Our cats greeted us upon arrival home as expected. We all proceeded to snuggle and watched adult swim until we fell asleep and so did the TV.

Favorite Things: BHLDN

I quickly jumped onto BHLDN's website this morning first thing to scour the goods in their entirety! Hooray for Monday, for once! I picked at least one thing out of each section in their shop except for lingerie that I would buy immediately. Here is the collection of pretty that I favor.


All Images from BHLDN

Once you go look, tell me what you like!!!


11 February 2011

Midway Through Planning

Lately I've been really happy and things are coming together for the wedding but I'm really, really busy!
When you read any wedding magazine, it does NOT tell you you'll have a stack of lists and papers and receipts along with a full weekly and weekend agenda toboot. It'll say something editorial like "Lists are Helpful" and "Save all your receipts." Do you know what that looks like?


That's right. It's cute and colorful on the outside, but it's the portal to paper pile hell and it's so full it's acquired damage to the inside pockets. I have papers in there from the first month of planning. EVERYTHING is in there. Even Shawn's wedding present design. He knows not to peek!
Do you also know what I look like at this time?
Yeah. A mix of happy, tired and OMG.

Anyway... I received my box of sunflowers I had such a hard time finding for a reasonable price. Only $12 for Two Dozen silk sunflower stems!!! I now have all the sunflowers for all the decorations and for my headpiece, also.

Speaking of headpiece... this weekend it'll be done and I smell a DIY for it on Monday.

Recent Love!

Love & Welcome All


Thank you for coming by to read my experiences as a wife and what came before it, as well. My husband Shawn and I were married June 10, 2011 in Omaha, NE! I enjoy sharing my stories and hearing other people's stories so please feel free to share any in the comments (especially dress stories!). I LOVE comments!

Lilypie First Birthday tickers

Proud to Be Featured