Hola ****** Bonjour ****** Shalom ****** Konichiwa ****** helo ****** allo! ****** barev ****** Sua s'dei ****** ni hao ****** jambo ****** hej ****** Bula uro ****** hyvää päivää ****** Guten tag ****** Γεια σου ****** Aloha ****** ha'u ****** Dia duit ****** Ciao ****** Yow Wah gwaan ****** chau ****** hei ****** talofa ****** hoezit ****** Kumusta ka ****** Li-ho ****** sawa dee-ka ****** sanibonani

Search Favorite Wedding Blogs

Loading

Search My Blog

Pin it!

Showing posts with label diy. Show all posts

19 December 2011

Last-Minute Christmas DIY Idea

2 Days til Hannukah!
2 Days til Solstice!
6 Days until Christmas!!!

If anyone needs a last minute gift idea, a wonderous DIY hath been born out of the order I'm currently finishing before this week is over. A gal I work with gave me her late Grandpa's sweater to make a bear out of for her niece as a Christmas gift. It was a great-sized sweater and had more than enough material for the bear itself so I decided to make her mittens and a headband out of the scrap bits and pieces. Today I will share how to make the headband because it is my favorite and I think it's realllllly cute.


You will need:


Old Sweater / Ribbed Band off of a sweater
Scissors
Needle
Thread


How to Craft it:

Measure and mark the band to match the circumference around your head. Cut the band to this measurement and stitch the ends together with a blanket stitch.

Use the excess band length to make the bow. Make another circular band, then overlap the ends as in the 2nd picture, and make a running stitch through all layers down the center of the bow.

Next cut a thinner band of trim off the sweater, like from around the neck. Wrap and stitch this around the center of your bow securely, and then attach this "bow" to your headband. I used a couple anchoring stitches on either loop to make sure the bow didn't flop too much.


This should take 30 min - 1 hour!

Are you making any holiday DIY's for decorations or presents?
I want to seeeeee!!!

09 December 2011

Bloggy-versary Giveaway!

-----GIVEAWAY IS CLOSED---

Last year I started blogging on THIS DAY!
Read the first post here!

Looking forward to the new year... 
 To celebrate I have decided to do another giveaway!!! This time it will be a little different. Instead of giving away a sock monkey YOU tell ME what you get! There's a choice of between a HiLLjO-made  amigurumi crochet animal of your choice; a standard-size sock monkey; or even a crochet accessory of your choice like a hat, socks, gloves or corset-style arm warmers!

Value of ths giveaway is $20USD and is open to International entries. Giveaway closes 12/26/11.

-----GIVEAWAY IS CLOSED---


Good Luck and Thanks for the Great Year!!!

14 November 2011

OFW : Drafting the Wedding Dress

Hello everybody!

While I have been away I have been busy, busy, busy!!!

I sketched out 3 ideas for the gown design...


The Original


Mizrahi Spring '12 Inspired


Then a short and/or convertible version of the Original.


This will be the first pattern I have to draft and design myself, too. Every article of clothing (with very few exceptions) needs a pattern. Since this is just a sketch I will have to "block out" my dress with a generic strapless gown shape and then get crafty with a yard stick, Kraft paper, sharpies, yarn, pins and my newly-acquired pride-and-joy: my dress form!!!
Usually dress forms are around $200 and I need to set that kind of cash aside for my fabric and Muslin mock-up yardage. I had literally NO options available to me to get a dress form before Christmas to get working NAOW.
Yes, I checked craigslist. Yes, I checked teh e-bays. No dice at all there.
$75 was the best deal I could find. I'd rather invest in one that is a working dress form and is adjustable from my-size and up, instead of buying a half-solution to my problem and having another problem to deal with. I was really racking my brain until Shawn reminded me what he mentioned last year (when I was going through the would-I-have-to-make-my-dress situation): Grandpa has one in his basement. Grandma bought it before she left Earth to make dresses with and never got to use it.
HOWWWW did I forget that?!

In any case... it was there. And it's not perfectly sized but it was perfectly free. And that covers up a lot of size issues. It can still be used to pin, draft and drape! So it will work.
It is now living in my office tingling with purpose.


AHHHH! I am SO excited now! NOTHING is standing in my way! Plus I just had a huge ego-boost: I can make my dress pattern WITH MATH!


The A-Line Ballgown Skirt is really a simple cone. To find the surface area of the skirt would be as good as knowing how many yards my pattern will take to complete the skirt before it is even made. I just have to divide my computing units into meters and take care to note they are in SQUARE INCHES. Failure to take note of that could increase my cost and leftover fabric approximately enough to piss me off for a whole day. So I took note.

As I block it out I will take pictures and post the progress of each step! I'm sorry if I'm not as fast movign as I'd like to be but it is the holiday season and I DIY a lot of my gifts for people! My hands will either be crocheting, blogging or pinning!

Just keep hanging in there with me!

07 November 2011

Real Wedding : Love You More, Love You Better

I am SO pleased and proud to present to you, one of my very-best bloggy gal-pals Kim at Party Frosting! has married her love D and has been married for 8 days today! She and D celebrated their nuptuals October 30. It was a rustic, orange, and wine themed celebration of love!


Kim and D did things their own way which I am a huge fan of! They DIY'd the stuff out of their wedding and also did these things their own way:
  • The wedding was in their lovely wood-accented home.
  • Kim held her daddy's hand and her dress instead of a bouquet.
  • Kim went barefoot at the last minute! BOO YAW!
  • No attendants; just surrounded by people they love and who love them.
  • They had their favorite cake instead of a big fancy wedding cake.
  • They had a wine tasting class instead of a first dance.
  • They had a wine ceremony instead of a candle unity ceremony. WOOT!
Congratulations to Kim and D!
Read all about her wedding planning journey here and visit her Party Planning prowess blog here!

09 August 2011

FREE Favicon Design

I don't know if you have noticed but lately blogger has come out with some new features to brand your blog! One of these is using a Favicon. Instead of the Orange Square with white Blogger B, you can now use any square image 100KB or less!
If you would like one but don't care to make one or you don't have time, I would LOVE to make you one for free. It just gives me a happy skip in my heart.

Just email me or leave a comment here and I will get on it!

08 June 2011

Cardigan Mini-Project

I am a huge fan of the bride-in-a-cardigan. Especially in my color, yellow.


However, it is not hard to find a picture of a bride in a cardigan. Even yellow cardigan bride comes up with a lot of results on google. I will wear a cardigan because I like this trend and a hoodie (like I usually wear) just won't do. To separate myself from the rest of the cardigan brides and yellow cardi-brides I replaced the buttons my cardigan was made with and sewed the replacements on, sourcing them from my very own collection. Now I have a special, very buttony cardi that is perfect for MEEEE!

LOVE IT!

31 May 2011

Colored Wedding Dress Crinoline Part 2: Mere Mortals Dye Poly Tulle

So I tried to dye my ivory crinoline yellow about 2 weeks ago with regular Tulip Dye... FAIL. The deeper shade of ivory it turned rinsed right out!
Upon investigation into the material contents of the crinoline, (Read: I did online research, called the shop I bought my dress from, and then FINALLY called my dress designer's world headquarters) I found that it is Poly-tulle. It is made of Polyester.
Now folks, no mere mortal can dye polyester fabric. However, I do not take kindly to the idea of a white crinoline I could have just left attached to the damn dress!
So I did some more research into what WOULD dye polyester. Apparently there is a poylester dye that comes in its very own packet and everything. It is called iDye Poly and although it comes in limited colors, it comes in yellow and it works! Shawnie did most of the work and I stood by with my nervously bitten lip.
We put a stainless steel bucket on the stove with warm-to-hot water in it. We put it up to level 4 on the burner to get it simmering. We added the skirt and Shawn stirred it constantly to keep the color even and to keep the crinoline from cooking!
It got gradually darker over the course of 30 minutes.

Before

5 Minutes

10 Minutes! Soaked up a lot of color!!!
Woohoo! Results!!!

I'd like to thank Shawn (for dying and emotional support), Grandpa (for using his bathtub and carwashing bucket without fear of stains) and my mom (for listening to me bitch when it wouldn't work and I couldn't figure out how to make it work!). I will have a colored crinoline for under my dress.

There is a downside to this DIY: it took SO. FREAKING. LONG. that I handed it off to my alterations lady for Part 3 : the elastic waist. All I will have is after-after pics! Hang in there!

26 May 2011

Sock Bunnies : Completed!

Do I need to write a post to go along with these?

No. They are just that awesome. ƸӜƷ

Results of Last Minute Veil DIY!

Hello, lovelies.
So yesterday I described how all the while that I have been planning my Wedding Day ensemble, I simply knew I did not want a traditional veil. I thought the answer for me was a hair wreath. I tried to make one for 6 WEEKS until I finally designed one I like. While that was failing previously I tried a simple flower in the hair, which I love, too.
I took all my accessories with me to my final fitting last Saturday only to discover that I don't like my accessories with my wedding gown! The shoes are too bulky with the dainty dress and the hair wreath only perpetuates my young-as-hell looks. I want to look grown up and womanly like all the brides I see at their weddings. I'm okay with looking like my young-faced self everyday but on my wedding day I want to look like a woman. The hair wreath is lovely, but not for me.

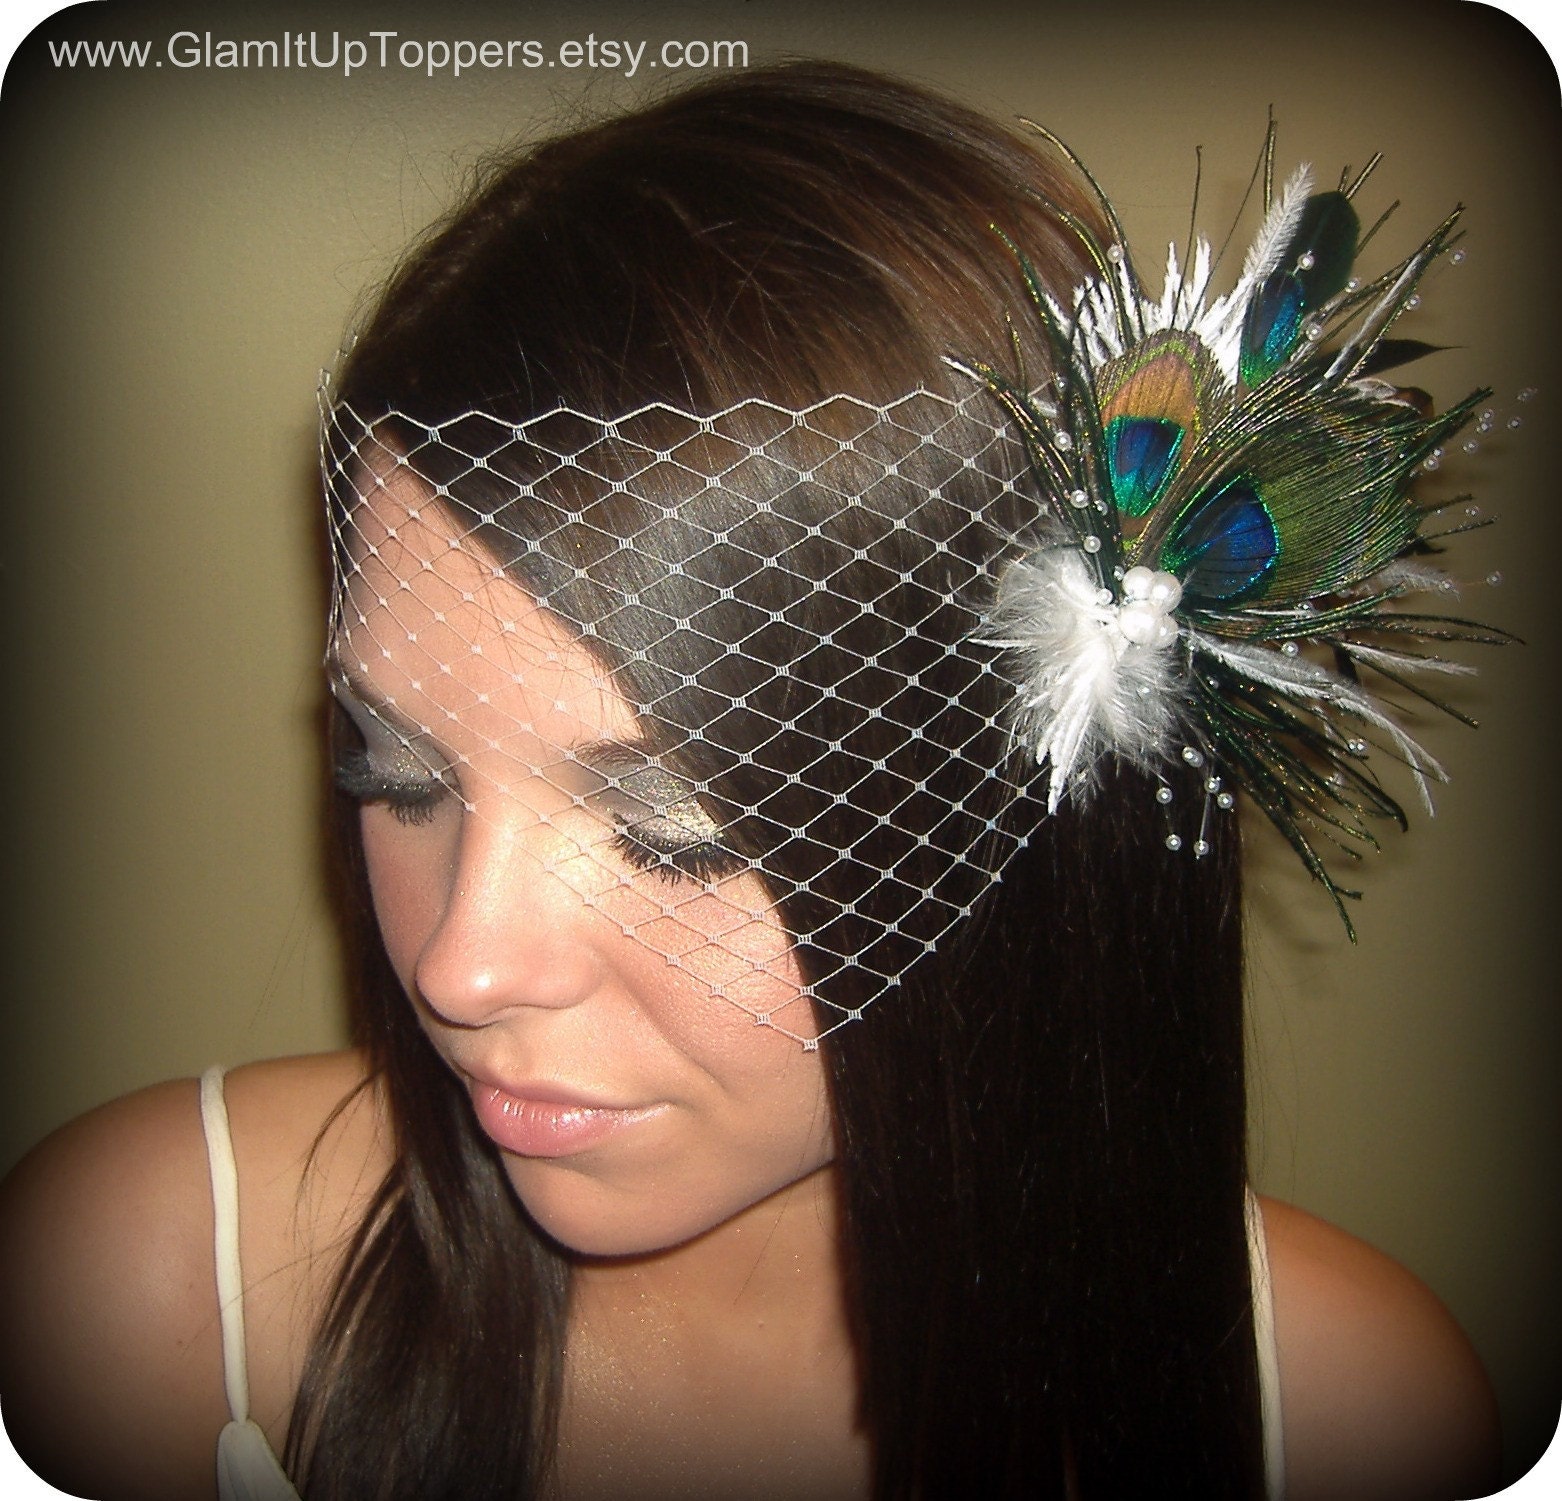
I don't recall where I saw it but recently there was a bride featured on one of my favorite blogs who had a version of a birdcage where the netting was in a crescent shape across only her eyes. I wanted to try one of those, but I had to find a good picture and find out what it was called!
After much googling of terms like "mini birdcage" and "eye veil" I found out that they are called bandeau veils or visor veils.
I googled up some good reference and inspiration photos and got to work making a diagram and list of supplies for myself (I have become VERY organized whilst planning!). I had everything but mini combs to attach it in my hair. After going to Sally Beauty I didn't find mini combs, but I got the 2-prong pincurl clips that looked like they would work, too.

I went home and laid out my supplies and got to work. It took around 5 minutes. Ava helped me mark my tulle; she bit it! But it was actually just where I needed to cut it... odd, yet wonderful! I cut a double-length to make a double layer of tulle by folding it in half. Then I folded the outside corners on each end to the center, pinching the layers together as I folded. Then I sewed a stitch and knot into the layers to keep it together before attaching it to the clip. The clip felt most secure in my hair with the prongs pointing down towards the floor, so I sewed each one onto the backside of sewn tulle clusters. The veil itself was "done" after that. I chose to add a sunflower barrette on the left side of it for my flower in the hair.


Which do you like better?

25 May 2011

Why do I do this to myself?!

After my final dress fitting on Saturday with all my extras, I came to a hard realization: I love my dress and I love my accessories, just not together! I think I am lucky because I still have time and I am not discovering this the day-of. I also feel lucky because it is freaky-common for brides to start hating their dress around the point we are at in wedding planning. Neither of those things happened so I am just focused on fixing my accessories at this point.
I am going to go barefoot until someone tells me to put shoes on that day. I love my sandals, but I REALLY love how my dress looks with me barefoot. It's so right.
The headpiece makes me look like a little girl in a big wedding dress. I do not appreciate looking younger when I already look like a baby! I want to look like a woman on my wedding day for my Shawnie.


lifespringphotography.com
 So, having said all this I go forth to make something new. Yes, at 16 days to the wedding, a new project.
The Last-Minute DIY Visor Veil

Inspiration:
Check back tomorrow for the results and a whole good lot of photos!!!

11 May 2011

Aisle Runner FAIL comme Headpiece FAIL

Last weekend we got a lot of things done. We were wiped out, but we had a general feeling of well-being from things being taken off our backs. One thing we tried to do that was a FAIL was the aisle runner. These DIY's that are repeat-FAILS astound me. I never expect them to be so difficult to execute! The other hard DIY was the headpiece... unfortunately that took 6 weeks and we don't have half that time. I might just be painting one or several large flowers on it near the personalization and then call it good. It's only 40ft long, how much can I do in under a month?!
The biggest struggle is laying out the runner in an area that is clean enough and long enough to paint it. Outside is a no. Our hallway turned out to be a no. Upstairs might work but we'll have to lock Grandpa's dog away... *shudder.* She's wild.
The thickness... well thin-ness rather, of the runner itself is a challenge as well. It's SO thin. I'd venture to say it's paper-thin. Good thing about that: minimal paint required. Bad thing about that: My fingernail could tear it. We'll keep those fingernails crossed that it stays in one piece and looking nice.
Shawn tried to help me roll it out, roll it up, everything. Poor thing is probably so sick of me! He helps me sooo much. I'm lucky.
I'll be sure to keep that topic updated on here. I hope we get it done!

09 May 2011

Sock Bunny Rabbits

I make sock monkeys and Shawn and I both have one, but for the wedding guestbook table we wanted something that tied into our bunny theme. Sock bunnies seemed a pretty natural choice. They're also a nod to the homemade bunny dolls Shawn's Grandma used to make when she was still here. The faces/profiles were made in the same way and shape.
Shawn's bunny with full details is here.
Here are ours so far together sans eyeballs!

Check out the spectacular button I found that matches my engagement ring. Square with a round stone! More on these soon!

06 May 2011

Flower Girl Baskets - DIY Tutorial #7

I finally got my rear in gear and finished an easy DIY.


For supplies:
2 flower girl baskets
Yellow Grosgrain Ribbon
Hot glue gun + sticks
Fake flora

Instructions:
If your flower girl baskets are shoddy quality (like mine unknowingly were!) secure any loose panels/handles with hot glue and apply light pressure.

Next, practice placing the ribbon on your basket so that it will lay flat all the way around. Place a dot of hotglue in the center of the front and attach your ribbon there. Add a glue spot to the middle of each side while you wrap your ribbon around it to make sure it's secure.
Next, make your bow stylistically. Meaning: don't make a real bow, just one that looks supernatural-perfect.

So first make a little loop and secure it with glue. Then cut a piece to cover the middle. Then position it so it is perfectly in the middle. Wrap the edges and secure them with hot glue.
You should have something like this:
Then just glue this guy onto the basket ribbon.

So cute!!! Not quite done, though. Add some fake flora (not too much!!!) and you're good to go. I'm storing mine in the bags they came in so that they stay nice and safe! Plus it recycles the bags!


04 May 2011

Terra Cotta Bunnay - DIY UPDATE!

Shawn's momma Donna just MMS'd me these photos of our Inity Ceremony planter!!! OMG it's perfect!!! She also would like to put our names + date on the bottom! So cute!
What do you think between before and after?!


BEFORE

AFTER

LOOK AT THAT BUNNAY LIP!!!
I know it's silly but this is the planter of my dreams!!! It's one of those magical details that just makes this truly my dream wedding. I just love this. 

29 April 2011

Extra Invite Karma

While doing a seemingly not-so-fun job of making additional incidental invitations, a goldmine hath been found. We have been sending our empty-inside, gold-embossed-butterfly outside Thank-you's for leftover invites. These are mainly going to Shawn's friends who he thought of after the blue butterfly invites were all mailed. People from work, you know? He helped, anyway!

I had to buy extra envelopes to finish mailing our blue invites because that's the only thing we bought too few of, so I can't complain about that! I ended up getting gorgeous yellow envelopes (small and large for Invite and RSVP) and I was originally irritated to pay more because the large came with cards.
The handmade ivory paper used on the blue invites is actually mounted intentionally on the "wrongside" so you can't see the metallic flake on the "rightside." It was too busy on the butterfly invite, but as you can see: they're just right on these guys!!!
And how gorgeous is the RSVP with the paper rightside showing with the embossed butterfly?
I guess the cards I was forced to buy worked out, too!!!
I just love happy accidents that come about from doing the right thing: invite all you love, damn the headcount.

28 April 2011

POLL : DIY Wedding vs. Handmade Wedding

Create your free online surveys

DIY Tutorial #6 - Framed Chalkboard Signs

I am in love with the chalkboard trend for weddings.
They're cute, customizable and I think they're becoming increasingly easy to find. Save-On-Crafts has a bunch but beware their shipping charge... yikes!
I went the DIY route on this because I can't justify paying more for shipping than the total of my supplies!

What I started with:

1 jar of Crayola Chalkboard Paint
1 Foam Brush
2 Rustic 5x7 picture frames (with a hanger on the back)
A hot glue gun w/ glue sticks
1 (4) yard spool of non-wired ribbon in a width >1/4"
Paper to protect your work surface

Prep your frames by removing the cardboard inserts(don't throw them away!) and the glass carefully. I removed the easel-back but it was stupid-hard. If you leave it on, you can use the frame after the wedding possibly.
Lay out your protection paper and lay out 2 of the cardboard inserts from the frames. Paint each one in a thin coat of paint on each one in ONE direction and let dry. After they dry, repeat another thin coat of paint and let that dry as well.
Plug in your hot glue gun and glue one painted cardboard insert to the plain one so it's thicker.
Position your double-layer cardboard onto the back of the frame closure and glue it into place.
Once it has cooled and is secure, glue the inside of the frame edge and close the frame closure, applying pressure to seal it shut.
Flip them over and check out your handiwork.
To string them up, cut a length of 2 yds and fold the edge in half, then pull through the hanger loop. Make a double-knot at the height you'd like your bow and then make a bowtie.
Let your paint cure for 24 hours before prepping it for chalk. Once it has been a FULL 24 hours coat the entire surface with a sideways piece of chalk, wipe clean and then it is officially a chalkboard.
Rustic-Fabulous!!!

Recent Love!

Love & Welcome All


Thank you for coming by to read my experiences as a wife and what came before it, as well. My husband Shawn and I were married June 10, 2011 in Omaha, NE! I enjoy sharing my stories and hearing other people's stories so please feel free to share any in the comments (especially dress stories!). I LOVE comments!

Lilypie First Birthday tickers

Proud to Be Featured